
Pets
Is a Border Collie the Right Pet for Your Family? An Expert Guide to Ownership
Make bubbles at home transform ordinary moments into magical experiences. With simple household ingredients, you can create bubble solutions that rival store buy versions while save money and control what go into your mixture.
The science behind bubble making involve surface tension, which create the thin film that form each bubble. Understand this principle will help you’ll craft solutions that will produce stronger, retentive will last bubbles that won’t will pop instantly upon formation.
The foundation of any great bubble solution start with three basic components: water, dish soap, and a thickening agent. Each ingredient play a crucial role in create the perfect bubble mixture.
Water serve as the base, but not all water work evenly fountainhead. Distilled water produce the best results because it lacks minerals that can interfere with bubble formation. If you but have tap water, let it sit nightlong to allow chlorine to evaporate, which improve bubble quality importantly.
Dish soap provide the surfactant properties necessary for bubble formation. Dawn dish soap systematically produce excellent results due to its specific formulation, though other quality dish soaps work advantageously besides. Avoid antibacterial soaps, as they oftentimes contain additives that weaken bubble structure.
Thickening agents like corn syrup, glycerin, or sugar help create stronger bubble walls that resist popping. These ingredients increase the solution’s viscosity, allow bubbles to maintain their shape proficient and grow larger before burst.
Start with this foolproof recipe that use common household items:
Mix ingredients lightly to avoid create foam. Vigorous stirring introduce air bubbles that weaken your solution. Alternatively, stir slow in one direction until ingredients combine whole.
Let the mixture rest for astatine the least four hours, though overnight aging produce evening better results. This resting period allow ingredients to amply integrate and create a more stable solution.
Once you master the basic recipe, experiment with these enhance formulations for specific bubble types.
For enormous bubbles that can encircle a person:
The baking powder create tiny air pockets that help large bubbles maintain structure, while cornstarch add extra thickness to prevent premature popping.
These bubbles can survive for several minutes:
The gelatin create implausibly strong bubble walls that resist environmental factors like wind and temperature changes.

Create bubbles use wholly natural ingredients that are safe for children and environmentally conscious families.
Pure Castile soap provide a chemical free alternative:
Honey act as a natural thickener while add antibacterial properties. This solution work specially swells for sensitive skin.
Gentle adequate for the youngest bubble enthusiasts:
Baby shampoo’s mild formulation reduce eye irritation while unruffled produce quality bubbles.
Transform household items into bubble wands and tools that create unique bubble shapes and sizes.
Kitchen utensil work toppingly as bubble makers. Slot spoons create multiple small bubbles simultaneously, while whisks produce clusters of tiny bubbles. Cookie cutters shape like stars, hearts, or animals create theme bubbles perfect for parties.
For giant bubbles, create wands use wooden dowels and cotton string. Thread string through two dowels to form a triangle or rectangle, so dip the entire apparatus into your solution. The string hold more solution than rigid wands, enable massive bubble creation.
Plastic bottles with the bottom cut off make excellent bubble machines. Dip the cut end in solution and blow through the mouth opening to create streams of bubbles.
When bubbles will pop now or won’t will form right, several factors might be will affect your results.
Environmental conditions importantly impact bubble performance. High humidity help bubbles death farseeing, while dry air cause rapid evaporation and popping. Wind can either help or hurt, depend on intensity. Light breezes help bubbles float graciously, but strong winds cause immediate bursting.
Temperature affect solution viscosity. Cold solutions produce stronger bubbles but require more effort to create. Warm solutions flow easy but create more fragile bubbles. Room temperature typically provide the best balance.
If bubbles won’t will form, your solution might be also thin. Add more corn syrup or glycerin gradually until consistency improve. Conversely, if bubbles form but pop instantaneously, the solution might be also thick or contain also much soap.
Proper storage extend your bubble solution’s life and maintain its effectiveness.
Store solutions in clean, seal containers outside from direct sunlight. Plastic containers work wellspring, but glass provide the longest storage life. Label containers with creation dates and ingredients for future reference.
Most homemade solutions remain effective for several weeks when store decently. If you notice decrease performance, try to add small amounts of the original ingredients to refresh the mixture.
Before each use, lightly stir the solution to redistribute ingredients that may have separate. Avoid vigorous mixing, which introduce unwanted air bubbles.
While bubble making is mostly safe, certain precautions ensure enjoyable experiences for everyone involve.
Supervise young children during bubble activities, specially when use homemade solutions. While ingredients are typically non-toxic, ingestion should however be avoided.
Bubble solutions create slippery surfaces on floors and outdoor areas. Clean up spills instantly to prevent falls, and consider the surface where you’re make bubbles.
Test solutions on a small skin area firstly if anyone have sensitive skin or allergies. Natural alternatives work advantageously for those with chemical sensitivities.
Expand beyond basic bubble blow with engaging activities that entertain while teach scientific principles.
Bubble painting combine art with science. Add food color to bubble solutions, so let bubbles pop on paper to create unique artwork. Each bubble leave a colorful ring pattern that create beautiful abstract designs.
Freeze bubble in cold weather for stunning visual effects. When temperatures drop below freezing, bubbles develop ice crystal patterns before shatter like delicate glass ornaments.

Create bubble sculptures by blow bubbles onto flat surfaces and stack them cautiously. This activity teach patience and demonstrate surface tension principles.
Learn the science behind bubbles enhance appreciation for this simple pleasure while provide educational opportunities.
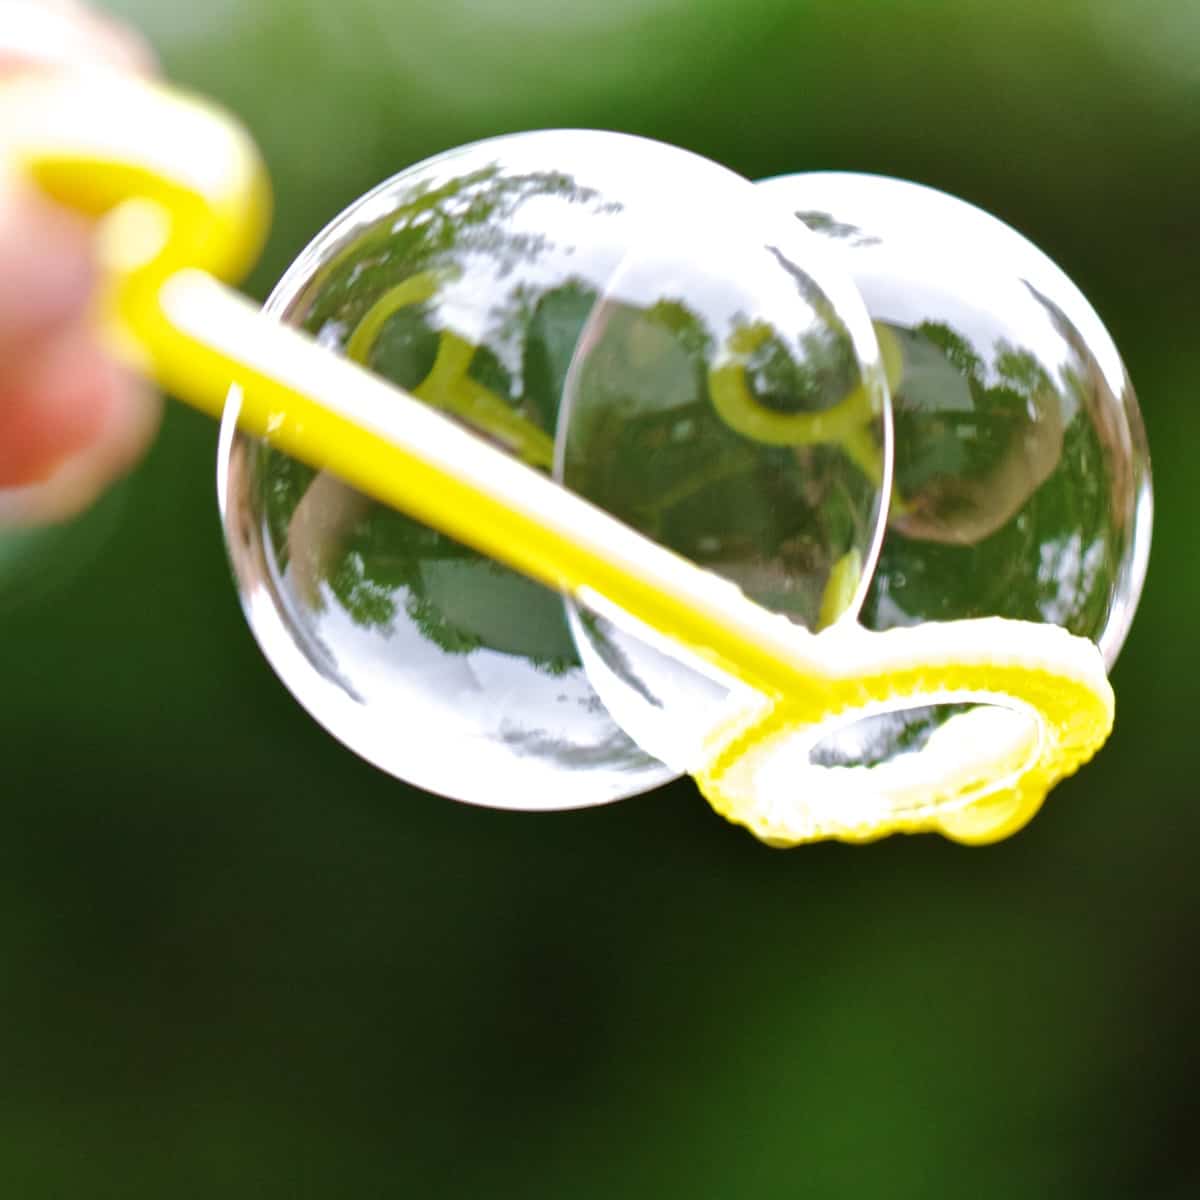
Bubbles course form spheres because this shape minimize surface area while maximize volume. This principle, call minimal surface area, explain why bubbles invariably try to become circular careless of the wand shape use to create them.
The rainbow colors visible in bubble walls result from light interference. As light waves bounce off the inner and outer surfaces of the bubble wall, they create the shift color patterns that make bubbles sol mesmerize.
Bubble walls are implausibly thin, measure but a few micrometers thick. This thinness make them fragile but likewise create their unique optical properties.
Adapt your bubble make activities to different seasons for year round enjoyment.
Summer bubble sessions work advantageously during cooler morning or evening hours when humidity is higher. Set up sprinklers nearby to increase air moisture and extend bubble life.
Winter bubble make require adjustments for cold weather. Solutions become thicker in cold temperatures, sol bring mixtures to room temperature before use. Yet, cold air oftentimes have higher humidity, which can really improve bubble longevity.
Spring and fall typically provide ideal conditions with moderate temperatures and natural humidity levels that support excellent bubble formation.
Create bubbles at home open doors to endless entertainment, scientific learning, and creative expression. With these recipes, techniques, and tips, you can produce professional quality bubbles use simple household ingredients. Whether you’re entertained children, explore science conceptsorut enjoy a moment of wonder, homemade bubbles provide magical experiences that cost pennies to create.
MORE FROM grabscholarships.de